
Basque Burnt Cheesecake: A Slice of Heaven
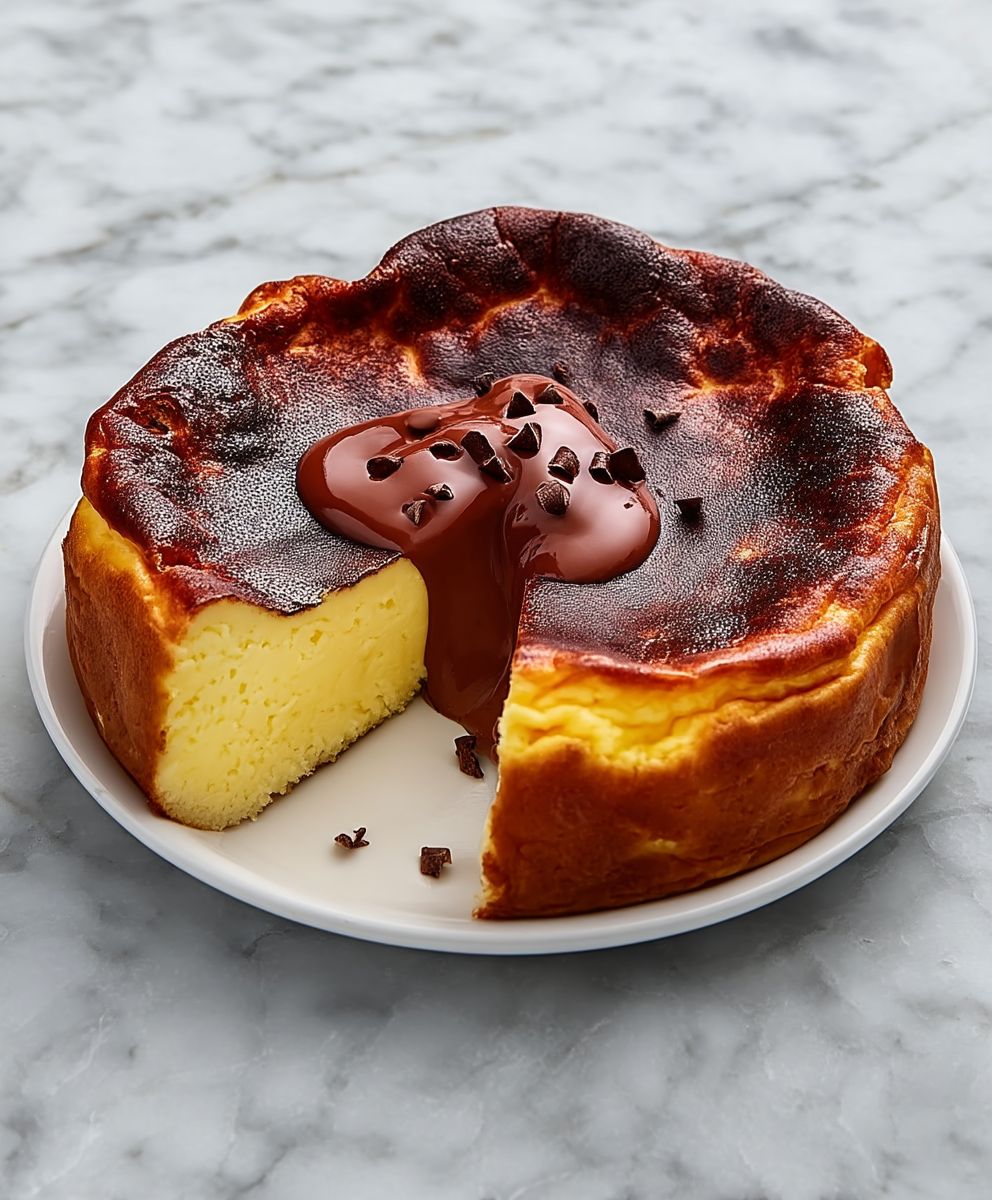
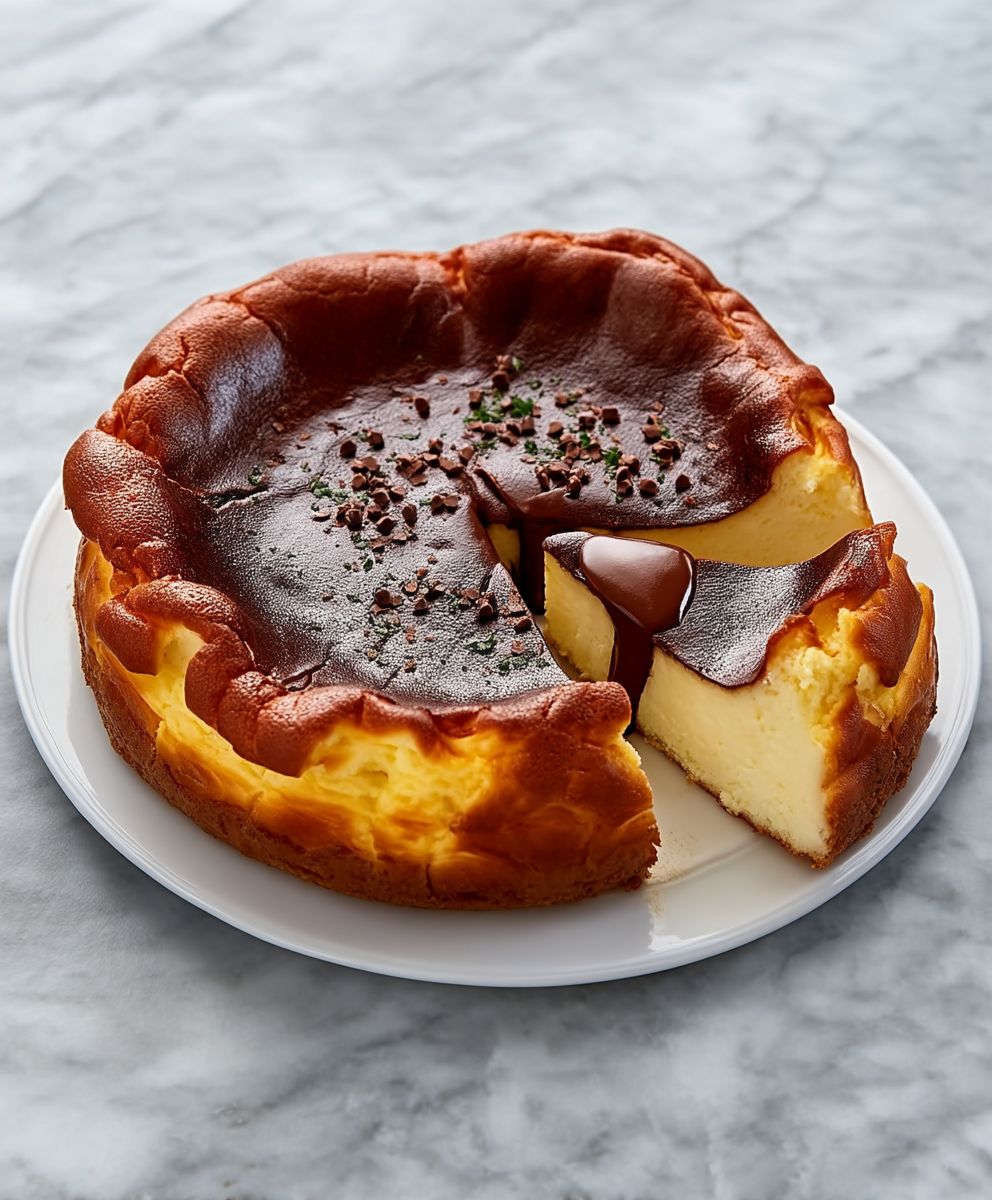
Basque Burnt Cheesecake is not just a dessert; it’s an experience that tantalizes the taste buds and warms the heart. Originating from the Basque region of Spain, this cheesecake has gained worldwide acclaim for its unique, caramelized top and creamy interior. The first time I tried this delightful treat, I was captivated by its rich flavor and velvety texture, which perfectly balances sweetness with a hint of bitterness from the burnt crust.
What makes Basque Burnt Cheesecake so beloved is its simplicity and convenience. With just a handful of ingredients, you can create a dessert that looks and tastes like it came from a high-end bakery. The contrast between the slightly charred exterior and the luscious, smooth filling is a culinary masterpiece that leaves everyone wanting more. Whether served at a dinner party or enjoyed as a personal indulgence, this cheesecake is sure to impress and satisfy.
Join me as we dive into the world of Basque Burnt Cheesecake, where every bite is a celebration of flavor and tradition!

Ingredients:
- 2 cups (500g) cream cheese, softened
- 1 cup (200g) granulated sugar
- 1 cup (240ml) heavy cream
- 3 large eggs
- 1 teaspoon vanilla extract
- 1/4 cup (30g) all-purpose flour
- 1/4 teaspoon salt
- Butter, for greasing the pan
- Parchment paper
Preparing the Batter
- Preheat the oven: Start by preheating your oven to 400°F (200°C). This high temperature is key to achieving that signature burnt top.
- Prepare the baking pan: Take a 9-inch (23cm) springform pan and grease it lightly with butter. Then, line the bottom and sides with parchment paper, allowing the paper to extend above the edges of the pan. This will help with easy removal later.
- Mix the cream cheese: In a large mixing bowl, add the softened cream cheese. Using an electric mixer, beat the cream cheese on medium speed until it is smooth and creamy, about 2-3 minutes. Make sure there are no lumps.
- Add sugar: Gradually add the granulated sugar to the cream cheese while continuing to mix. Beat until the mixture is well combined and fluffy, about another 2 minutes.
- Incorporate the eggs: Add the eggs one at a time, mixing well after each addition. This ensures that the eggs are fully incorporated into the batter, creating a smooth texture.
- Mix in the heavy cream: Pour in the heavy cream and vanilla extract. Mix on low speed until just combined. Be careful not to overmix, as this can incorporate too much air into the batter.
- Add dry ingredients: In a separate bowl, whisk together the all-purpose flour and salt. Gradually add this dry mixture to the wet ingredients, mixing on low speed until just combined. The batter should be smooth and slightly thick.
Baking the Cheesecake
- Pour the batter: Carefully pour the cheesecake batter into the prepared springform pan. Use a spatula to smooth the top, ensuring an even surface.
- Bake the cheesecake: Place the pan in the preheated oven and bake for 25-30 minutes. The top should be deeply browned and the center should still be slightly jiggly. This is what gives the Basque Burnt Cheesecake its unique texture.
- Cool the cheesecake: Once baked, turn off the oven and leave the cheesecake inside for an additional 10-15 minutes. This gradual cooling helps prevent cracks from forming.
- Remove from oven: Carefully take the cheesecake out of the oven and let it cool at room temperature for about 30 minutes. Then, transfer it to the refrigerator to chill for at least 4 hours, or overnight for best results.
Assembling and Serving
- Prepare for serving: Once the cheesecake has chilled, remove it from the refrigerator. Carefully release the springform pan and peel away the parchment paper from the sides.
- Slice the cheesecake: Use a sharp knife to slice the cheesecake into wedges. For cleaner cuts, dip the knife in hot water and wipe it dry before each slice.
- Plate and garnish: Serve the cheesecake on individual plates. You can enjoy it plain, or add a dollop of whipped cream or fresh berries for a pop of color and flavor.
- Store leftovers: If you have any leftovers, cover the cheesecake with plastic wrap and store it in the refrigerator for up to 5 days. It can also be frozen for up to 2 months; just make sure to wrap it tightly.
Tips for the Perfect Basque Burnt Cheesecake
- Use room temperature ingredients: Make sure your cream cheese, eggs, and heavy cream are at
Conclusion:
If you’re looking for a dessert that is not only delicious but also visually stunning, then this Basque Burnt Cheesecake is a must-try! Its unique combination of a creamy, rich interior and a beautifully charred exterior creates a flavor profile that is simply irresistible. The slight bitterness from the burnt top perfectly balances the sweetness of the cheesecake, making each bite a delightful experience. Plus, the simplicity of the ingredients means you can whip it up with ease, even if you’re not a seasoned baker.
When it comes to serving suggestions, this cheesecake is incredibly versatile. You can enjoy it on its own, allowing the rich flavors to shine through, or pair it with fresh berries for a burst of freshness. A drizzle of honey or a sprinkle of sea salt can elevate the flavors even further, adding a touch of sophistication to your dessert. For those who love a bit of crunch, consider serving it with a side of crushed cookies or a nutty granola. If you’re feeling adventurous, you can even experiment with different flavor variations by adding a hint of citrus zest or a splash of vanilla extract to the batter. The possibilities are endless!
I encourage you to try this Basque Burnt Cheesecake for your next gathering or special occasion. It’s sure to impress your friends and family, and they’ll be asking for seconds! Don’t forget to share your experience with us. Whether you stick to the classic recipe or put your own spin on it, we’d love to hear how it turned out for you. Snap a photo and tag us on social media, or leave a comment below to let us know your thoughts.
Baking can be a wonderful way to express your creativity, and this cheesecake is the perfect canvas. So roll up your sleeves, gather your ingredients, and get ready to indulge in a dessert that is as delightful to make as it is to eat. Trust me, once you try this Basque Burnt Cheesecake, it will become a staple in your dessert repertoire. Happy baking!
Basque Burnt Cheesecake: The Ultimate Guide to Making This Delicious Dessert
Indulge in the rich and creamy Basque Burnt Cheesecake, featuring a caramelized top and a smooth interior. This easy dessert offers a unique twist on traditional cheesecake, perfect for any occasion.
Ingredients
- 2 cups (500g) cream cheese, softened
- 1 cup (200g) granulated sugar
- 1 cup (240ml) heavy cream
- 3 large eggs
- 1 teaspoon vanilla extract
- 1/4 cup (30g) all-purpose flour
- 1/4 teaspoon salt
- Butter, for greasing the pan
- Parchment paper
Instructions
- Preheat the oven to 400°F (200°C).
- Grease a 9-inch (23cm) springform pan with butter and line the bottom and sides with parchment paper.
- In a large mixing bowl, beat the softened cream cheese on medium speed until smooth and creamy, about 2-3 minutes.
- Gradually add the granulated sugar to the cream cheese while mixing, beating until well combined and fluffy, about another 2 minutes.
- Add the eggs one at a time, mixing well after each addition.
- Pour in the heavy cream and vanilla extract, mixing on low speed until just combined.
- In a separate bowl, whisk together the all-purpose flour and salt, then gradually add this dry mixture to the wet ingredients, mixing on low speed until just combined.
- Carefully pour the cheesecake batter into the prepared springform pan and smooth the top with a spatula.
- Place the pan in the preheated oven and bake for 25-30 minutes until the top is deeply browned and the center is slightly jiggly.
- Turn off the oven and leave the cheesecake inside for an additional 10-15 minutes to cool gradually.
- Remove the cheesecake from the oven and let it cool at room temperature for about 30 minutes, then transfer it to the refrigerator to chill for at least 4 hours, or overnight.
- Once chilled, remove the cheesecake from the refrigerator, release the springform pan, and peel away the parchment paper from the sides.
- Use a sharp knife to slice the cheesecake into wedges, dipping the knife in hot water and wiping it dry for cleaner cuts.
- Serve the cheesecake on individual plates, plain or with a dollop of whipped cream or fresh berries.
- If there are leftovers, cover the cheesecake with plastic wrap and store it in the refrigerator for up to 5 days or freeze for up to 2 months, wrapped tightly.
Notes
- Use room temperature ingredients: Make sure your cream cheese, eggs, and heavy cream are at room temperature for the best mixing results.
- For a deeper flavor, consider adding a splash of lemon juice or zest to the batter.


Leave a Comment