

Chinese Swiss Roll is a delightful dessert that beautifully marries the lightness of a sponge cake with the rich flavors of traditional Chinese ingredients. This unique treat has its roots in the fusion of Western baking techniques and Eastern flavors, making it a beloved choice for both celebrations and everyday indulgence. The soft, airy texture of the roll, combined with a luscious filling, creates a harmonious balance that keeps people coming back for more.
What I love most about the Chinese Swiss Roll is its versatility. You can fill it with a variety of ingredients, from sweet red bean paste to fresh fruits, allowing for endless flavor combinations. This dessert not only satisfies your sweet tooth but also offers a delightful experience with each bite. Whether served at a family gathering or enjoyed as a personal treat, the Chinese Swiss Roll is sure to impress with its elegant appearance and delicious taste. Join me as we explore this delightful recipe that brings a touch of cultural richness to your dessert table!

Ingredients:
- 4 large eggs
- 100g (1/2 cup) granulated sugar
- 80g (2/3 cup) all-purpose flour
- 20g (2 tablespoons) cornstarch
- 1 teaspoon baking powder
- 1/4 teaspoon salt
- 40g (3 tablespoons) unsalted butter, melted
- 1 teaspoon vanilla extract
- 200ml (3/4 cup) heavy cream
- 2 tablespoons powdered sugar
- 1 teaspoon vanilla extract (for the cream)
- Optional: fruit preserves or fresh fruits for filling
- Powdered sugar for dusting
Preparing the Batter
- Preheat your oven to 180°C (350°F). Line a 10×15 inch (25×38 cm) baking pan with parchment paper, ensuring the paper hangs over the edges for easy removal later.
- In a large mixing bowl, crack the 4 large eggs and add the 100g of granulated sugar. Using an electric mixer, beat the mixture on high speed for about 5-7 minutes until it becomes thick, pale, and fluffy. The mixture should form ribbons when you lift the beaters.
- In a separate bowl, sift together the 80g of all-purpose flour, 20g of cornstarch, 1 teaspoon of baking powder, and 1/4 teaspoon of salt. This will help to aerate the dry ingredients and remove any lumps.
- Gently fold the dry ingredients into the egg mixture using a spatula. Be careful not to deflate the batter; use a gentle folding motion until just combined.
- In a small bowl, combine the melted 40g of unsalted butter and 1 teaspoon of vanilla extract. Drizzle this mixture into the batter and fold it in gently until fully incorporated.
Baking the Cake
- Pour the batter into the prepared baking pan, spreading it evenly with a spatula.
- Bake in the preheated oven for 12-15 minutes, or until the cake is lightly golden and springs back when touched.
- While the cake is baking, prepare a clean kitchen towel by dusting it with powdered sugar. This will prevent the cake from sticking when you roll it.
- Once the cake is done, remove it from the oven and let it cool in the pan for about 5 minutes. Then, carefully invert the cake onto the prepared kitchen towel, peeling off the parchment paper.
- Starting from one end, gently roll the cake up with the towel, creating a log shape. This will help the cake maintain its shape when filled. Allow it to cool completely while rolled up.
Preparing the Filling
- In a mixing bowl, pour in the 200ml of heavy cream. Add the 2 tablespoons of powdered sugar and 1 teaspoon of vanilla extract.
- Using an electric mixer, whip the cream on medium-high speed until soft peaks form. Be careful not to over-whip, as you want a smooth and creamy texture.
- If you’re using fruit preserves or fresh fruits, prepare them now. If using fresh fruits, chop them into small pieces for easy spreading.
Assembling the Swiss Roll
- Once the cake has cooled completely, carefully unroll it from the towel. It should be pliable and not crack.
- Spread an even layer of whipped cream over the surface of the cake, leaving about 1 inch of space around the edges.
- If you’re using fruit preserves, spread a thin layer over the whipped cream. If using fresh fruits, sprinkle them evenly over the cream.
- Starting from one end, carefully roll the cake back up without the towel, making sure to keep it tight but not too tight to avoid squeezing out the filling.
- Once rolled, place the Swiss roll seam-side down on a serving platter. You can trim the ends for a cleaner look if desired.
Finishing Touches
<
Conclusion:
In conclusion, this Chinese Swiss Roll is a delightful treat that combines the lightness of a sponge cake with the rich flavors of your favorite fillings. Its unique texture and versatility make it a must-try for anyone looking to impress their family and friends or simply indulge in a sweet moment. The beauty of this recipe lies not only in its taste but also in its presentation; a beautifully rolled Swiss roll can be the centerpiece of any dessert table.
When serving your Chinese Swiss Roll, consider pairing it with a dollop of whipped cream or a scoop of vanilla ice cream for an extra touch of indulgence. Fresh fruits like strawberries or mango slices can also complement the flavors beautifully, adding a refreshing contrast to the sweetness of the roll. For those who enjoy a bit of crunch, a sprinkle of toasted nuts or a drizzle of chocolate sauce can elevate the dessert to new heights. You can even experiment with different fillings, such as matcha, red bean paste, or even a zesty lemon curd, to create variations that suit your taste preferences.
I encourage you to try this Chinese Swiss Roll recipe in your own kitchen. It’s not only a fun baking project but also a rewarding experience when you see the smiles on your loved ones’ faces as they take their first bite. Don’t hesitate to share your creations on social media or with friends and family. I would love to hear about your experiences and any unique twists you put on the recipe. Whether you stick to the classic flavors or venture into new territory, this Swiss roll is sure to become a favorite in your dessert repertoire.
So gather your ingredients, roll up your sleeves, and get ready to create a delicious masterpiece that will leave everyone asking for seconds. Happy baking!
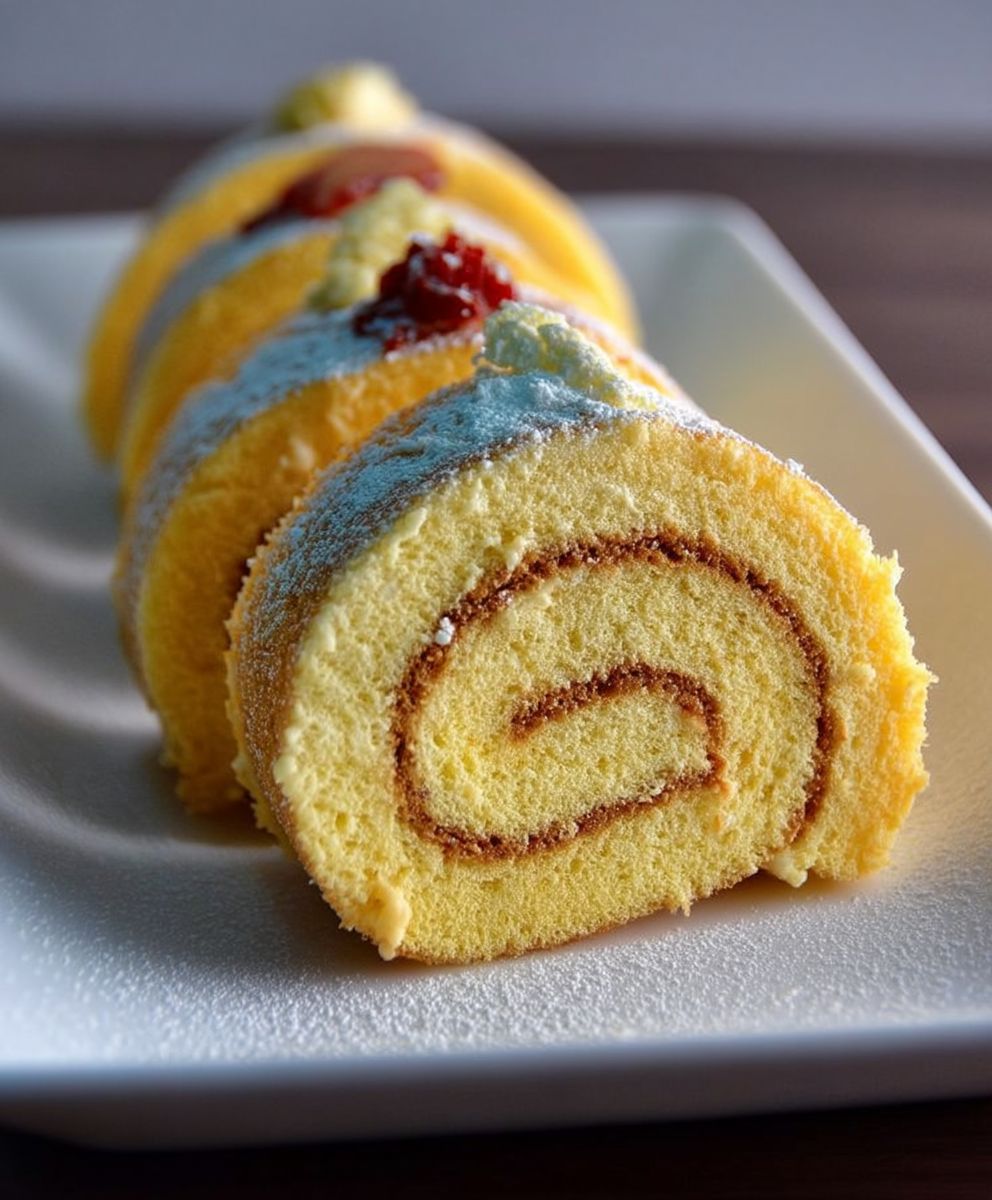
Chinese Swiss Roll: A Delicious Twist on a Classic Dessert
This Swiss Roll is a light and fluffy cake filled with whipped cream and your choice of fruit preserves or fresh fruits. It's an impressive dessert that's surprisingly easy to make, perfect for any occasion!
Ingredients
- 4 large eggs
- 100g (1/2 cup) granulated sugar
- 80g (2/3 cup) all-purpose flour
- 20g (2 tablespoons) cornstarch
- 1 teaspoon baking powder
- 1/4 teaspoon salt
- 40g (3 tablespoons) unsalted butter, melted
- 1 teaspoon vanilla extract
- 200ml (3/4 cup) heavy cream
- 2 tablespoons powdered sugar
- 1 teaspoon vanilla extract (for the cream)
- Optional: fruit preserves or fresh fruits for filling
- Powdered sugar for dusting
Instructions
- Preheat your oven to 180°C (350°F). Line a 10×15 inch (25×38 cm) baking pan with parchment paper, ensuring the paper hangs over the edges for easy removal later.
- In a large mixing bowl, crack the 4 large eggs and add the 100g of granulated sugar. Using an electric mixer, beat the mixture on high speed for about 5-7 minutes until it becomes thick, pale, and fluffy. The mixture should form ribbons when you lift the beaters.
- In a separate bowl, sift together the 80g of all-purpose flour, 20g of cornstarch, 1 teaspoon of baking powder, and 1/4 teaspoon of salt. This will help to aerate the dry ingredients and remove any lumps.
- Gently fold the dry ingredients into the egg mixture using a spatula. Be careful not to deflate the batter; use a gentle folding motion until just combined.
- In a small bowl, combine the melted 40g of unsalted butter and 1 teaspoon of vanilla extract. Drizzle this mixture into the batter and fold it in gently until fully incorporated.
- Pour the batter into the prepared baking pan, spreading it evenly with a spatula.
- Bake in the preheated oven for 12-15 minutes, or until the cake is lightly golden and springs back when touched.
- While the cake is baking, prepare a clean kitchen towel by dusting it with powdered sugar. This will prevent the cake from sticking when you roll it.
- Once the cake is done, remove it from the oven and let it cool in the pan for about 5 minutes. Then, carefully invert the cake onto the prepared kitchen towel, peeling off the parchment paper.
- Starting from one end, gently roll the cake up with the towel, creating a log shape. This will help the cake maintain its shape when filled. Allow it to cool completely while rolled up.
- In a mixing bowl, pour in the 200ml of heavy cream. Add the 2 tablespoons of powdered sugar and 1 teaspoon of vanilla extract.
- Using an electric mixer, whip the cream on medium-high speed until soft peaks form. Be careful not to over-whip, as you want a smooth and creamy texture.
- If you’re using fruit preserves or fresh fruits, prepare them now. If using fresh fruits, chop them into small pieces for easy spreading.
- Once the cake has cooled completely, carefully unroll it from the towel. It should be pliable and not crack.
- Spread an even layer of whipped cream over the surface of the cake, leaving about 1 inch of space around the edges.
- If you’re using fruit preserves, spread a thin layer over the whipped cream. If using fresh fruits, sprinkle them evenly over the cream.
- Starting from one end, carefully roll the cake back up without the towel, making sure to keep it tight but not too tight to avoid squeezing out the filling.
- Once rolled, place the Swiss roll seam-side down on a serving platter. You can trim the ends for a cleaner look if desired.
- Dust the top of the Swiss roll with powdered sugar before serving for an elegant finish.
Notes
- Ensure all ingredients are at room temperature for the best results.
- You can customize the filling with your favorite fruits or preserves.
- Store any leftovers in the refrigerator, covered, for up to 2 days.


Leave a Comment