
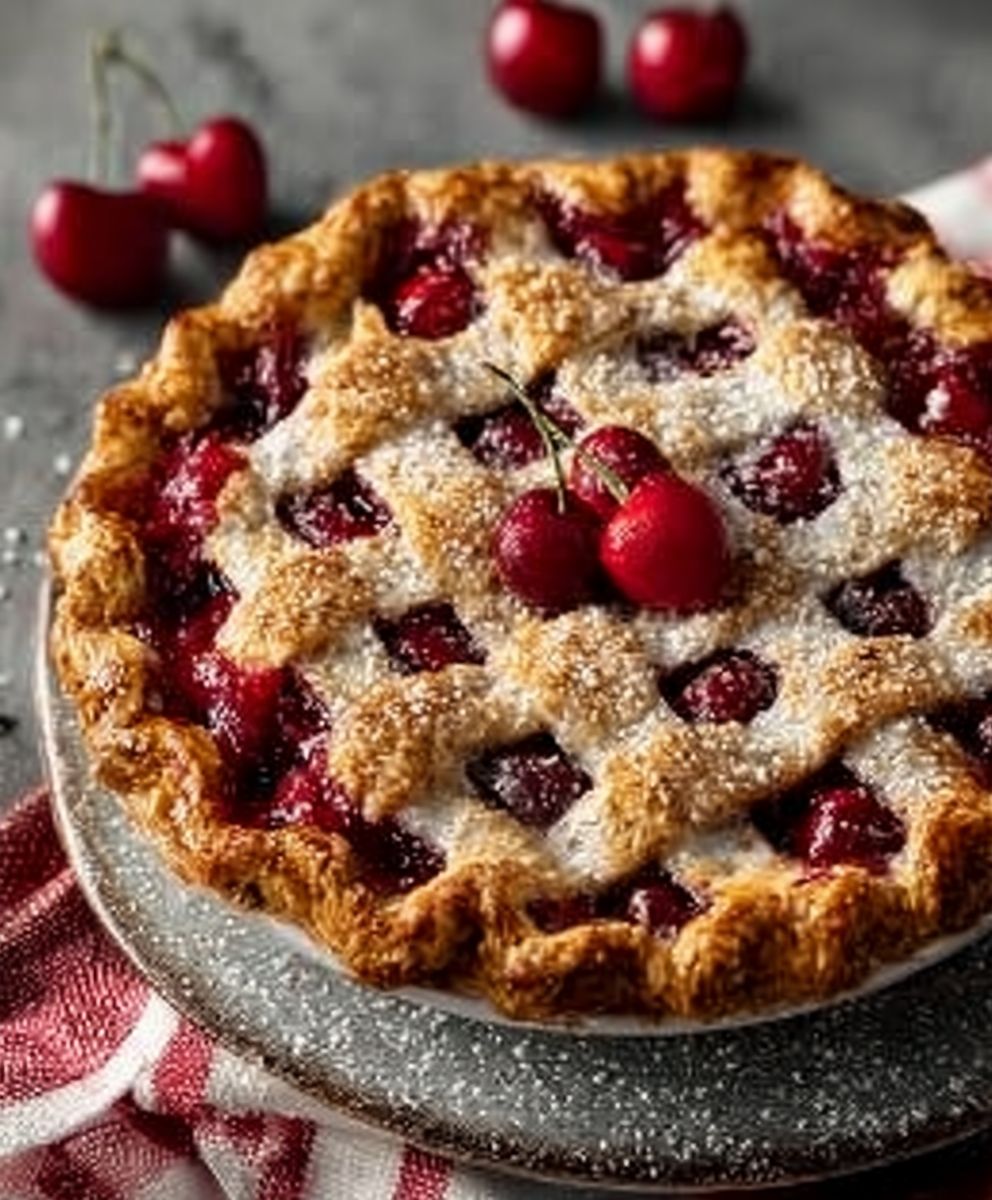
Easy Cherry Pie: A Slice of Nostalgia
Easy Cherry Pie is not just a dessert; it’s a delightful experience that brings back fond memories of family gatherings and summer picnics. This classic recipe has been cherished for generations, often passed down through families, each adding their own unique twist. The vibrant red cherries, nestled in a flaky crust, create a visual feast that is as appealing as it is delicious.
People love Easy Cherry Pie for its perfect balance of sweet and tart flavors, combined with a satisfying texture that melts in your mouth. The convenience of this recipe makes it a go-to for both novice bakers and seasoned chefs alike. With just a handful of ingredients and minimal prep time, you can whip up a pie that will impress your guests and satisfy your sweet tooth. Whether served warm with a scoop of vanilla ice cream or enjoyed on its own, Easy Cherry Pie is sure to become a favorite in your home.

Ingredients:
- 2 cups fresh or frozen cherries, pitted
- 1 cup granulated sugar
- 2 tablespoons cornstarch
- 1 tablespoon lemon juice
- 1 teaspoon vanilla extract
- 1/4 teaspoon almond extract (optional)
- 1/4 teaspoon salt
- 1 tablespoon butter, cut into small pieces
- 1 package refrigerated pie crusts (2 crusts)
- 1 egg, beaten (for egg wash)
- 1 tablespoon sugar (for sprinkling on top)
Preparing the Cherry Filling
- In a large mixing bowl, combine the pitted cherries and granulated sugar. If you are using frozen cherries, make sure they are thawed and drained of excess liquid.
- Add the cornstarch to the cherry mixture. This will help thicken the filling as it cooks.
- Stir in the lemon juice, vanilla extract, almond extract (if using), and salt. Mix everything together gently until the cherries are well coated with the sugar and cornstarch mixture.
- Let the cherry filling sit for about 10-15 minutes. This allows the juices to release from the cherries, creating a flavorful syrup.
Preparing the Pie Crust
- Preheat your oven to 425°F (220°C).
- While the cherry filling is resting, take the refrigerated pie crusts out of the package. Unroll one of the crusts and fit it into a 9-inch pie pan. Make sure to press it gently into the bottom and sides of the pan.
- Trim any excess crust hanging over the edges, leaving about 1 inch of overhang. This will allow you to fold the edges over the top crust later.
- Once the crust is in place, pour the cherry filling into the crust, spreading it evenly. Dot the filling with small pieces of butter to enhance the flavor.
Assembling the Pie
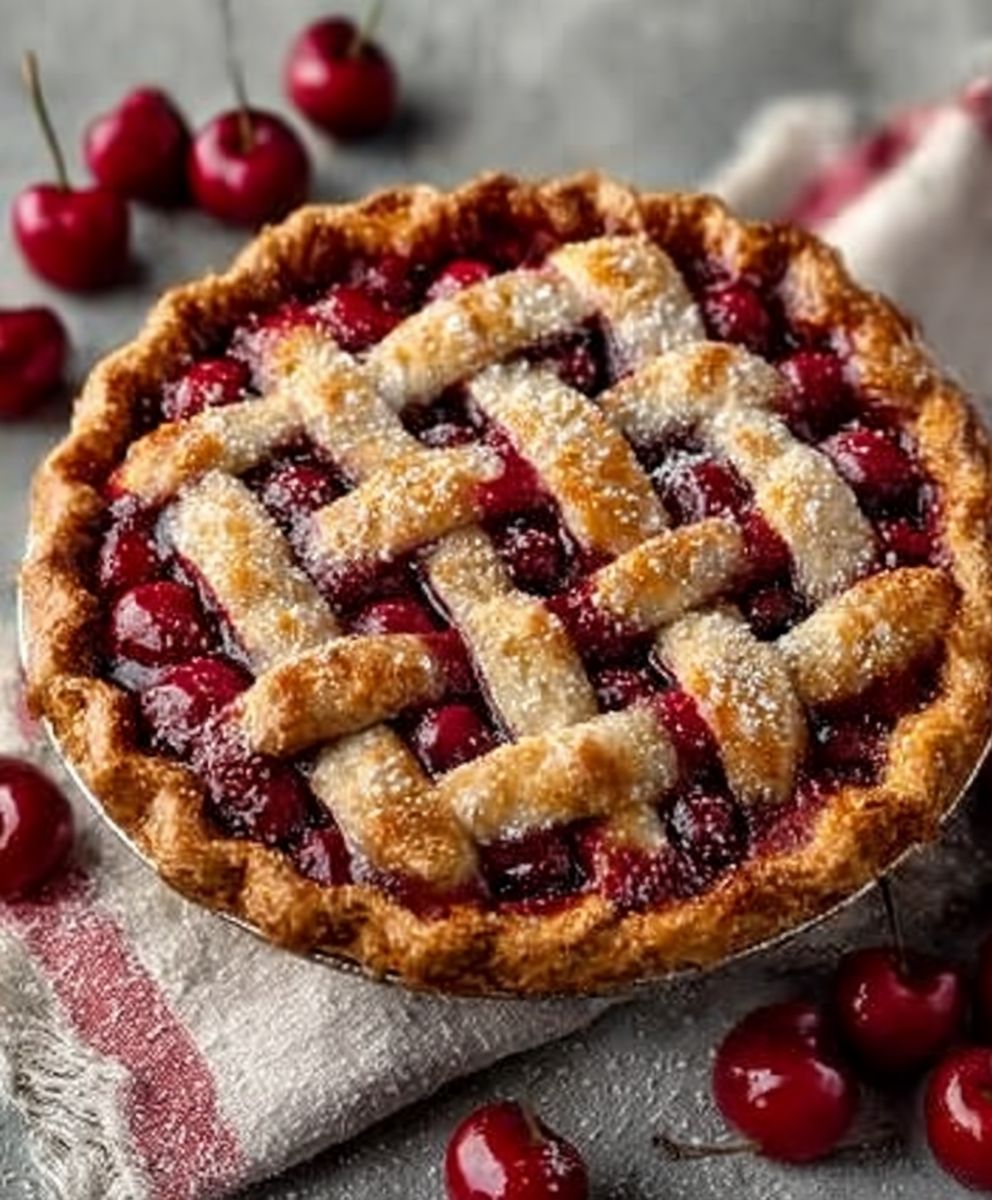
- Unroll the second pie crust and place it over the cherry filling. You can either leave it whole or cut slits in the top crust to create a lattice pattern. If you choose to make a lattice, cut the crust into strips and weave them over the filling.
- Trim the excess crust from the top layer, leaving about 1 inch of overhang. Fold the edges of both crusts together and crimp them to seal the pie. You can use your fingers or a fork to create a decorative edge.
- Brush the top crust with the beaten egg to give it a beautiful golden color when baked. Sprinkle a tablespoon of sugar over the top for added sweetness and crunch.
Baking the Pie
- Place the assembled pie on a baking sheet to catch any drips during baking. This will save you from a messy oven!
- Bake the pie in the preheated oven for 15 minutes at 425°F (220°C).
- After 15 minutes, reduce the oven temperature to 350°F (175°C) and continue baking for an additional 30-35 minutes. The pie is done when the crust is golden brown and the filling is bubbling.
- If the edges of the crust start to brown too quickly, cover them with strips of aluminum foil to prevent burning.
Cooling and Serving
- Once the pie is baked, remove it from the oven and let it cool on a wire rack for at least 2 hours. This cooling time allows the filling to set properly, making it easier to slice.
- After cooling, slice the pie into wedges and serve it plain or with a scoop of vanilla ice cream or whipped cream for an extra treat.
- Enjoy your homemade cherry pie with family and friends, and don’t forget to share the recipe!
Tips for the Perfect Cherry Pie
- For the best flavor, use fresh, ripe cherries when they are in season. If using frozen cherries, make sure they are unsweetened.
- Adjust the sugar based on
Conclusion:
If you’re looking for a dessert that’s both simple to make and utterly delicious, this Easy Cherry Pie is a must-try! With its flaky crust and sweet, tangy cherry filling, it’s the perfect way to celebrate the flavors of summer or to bring a touch of nostalgia to your dessert table. The best part? You don’t need to be a baking expert to whip this up; even novice bakers will find success with this straightforward recipe.
One of the great things about this Easy Cherry Pie is its versatility. You can serve it warm with a scoop of vanilla ice cream for a classic treat, or enjoy it cold with a dollop of whipped cream for a refreshing finish. If you’re feeling adventurous, consider adding a sprinkle of almond extract to the filling for an extra layer of flavor, or mix in some blueberries for a delightful twist. You could also experiment with different crusts—try a crumb topping for a crunchy texture or even a lattice crust for a beautiful presentation.
I encourage you to gather your ingredients and give this Easy Cherry Pie a try. It’s not just about the pie itself; it’s about the joy of baking and sharing something homemade with your loved ones. Once you’ve made it, I’d love to hear about your experience! Did you stick to the classic recipe, or did you put your own spin on it? Share your thoughts and any variations you tried in the comments below.
Baking can be a wonderful way to connect with family and friends, and this Easy Cherry Pie is sure to be a hit at any gathering. Whether it’s a summer barbecue, a holiday feast, or just a cozy night in, this pie will bring smiles to everyone’s faces. So roll up your sleeves, preheat that oven, and let the sweet aroma of cherry pie fill your kitchen. You won’t regret it!
Easy Cherry Pie: A Simple Recipe for Delicious Homemade Dessert
Indulge in a classic homemade cherry pie with a sweet and tangy filling nestled in a flaky, buttery crust. Perfect for any occasion, this delightful dessert is sure to impress your family and friends!
Ingredients
- 2 cups fresh or frozen cherries, pitted
- 1 cup granulated sugar
- 2 tablespoons cornstarch
- 1 tablespoon lemon juice
- 1 teaspoon vanilla extract
- 1/4 teaspoon almond extract (optional)
- 1/4 teaspoon salt
- 1 tablespoon butter, cut into small pieces
- 1 package refrigerated pie crusts (2 crusts)
- 1 egg, beaten (for egg wash)
- 1 tablespoon sugar (for sprinkling on top)
Instructions
- In a large mixing bowl, combine the pitted cherries and granulated sugar. If using frozen cherries, ensure they are thawed and drained of excess liquid.
- Add the cornstarch to the cherry mixture to help thicken the filling as it cooks.
- Stir in the lemon juice, vanilla extract, almond extract (if using), and salt. Mix gently until the cherries are well coated.
- Let the cherry filling sit for about 10-15 minutes to allow the juices to release.
- Preheat your oven to 425°F (220°C).
- Unroll one pie crust and fit it into a 9-inch pie pan, pressing gently into the bottom and sides.
- Trim excess crust, leaving about 1 inch of overhang.
- Pour the cherry filling into the crust and dot with small pieces of butter.
- Unroll the second pie crust and place it over the filling. You can leave it whole or cut slits for a lattice pattern.
- Trim excess crust from the top layer, fold edges together, and crimp to seal.
- Brush the top crust with beaten egg and sprinkle with sugar.
- Place the pie on a baking sheet to catch drips.
- Bake at 425°F (220°C) for 15 minutes.
- Reduce temperature to 350°F (175°C) and bake for an additional 30-35 minutes until the crust is golden and filling is bubbling.
- Cover edges with aluminum foil if they brown too quickly.
- Let the pie cool on a wire rack for at least 2 hours to set the filling.
- Slice and serve plain or with vanilla ice cream or whipped cream.
Notes
- For the best flavor, use fresh cherries when in season. Adjust sugar based on the sweetness of the cherries.
- Serve warm for the best taste, but it can also be enjoyed cold.


Leave a Comment