
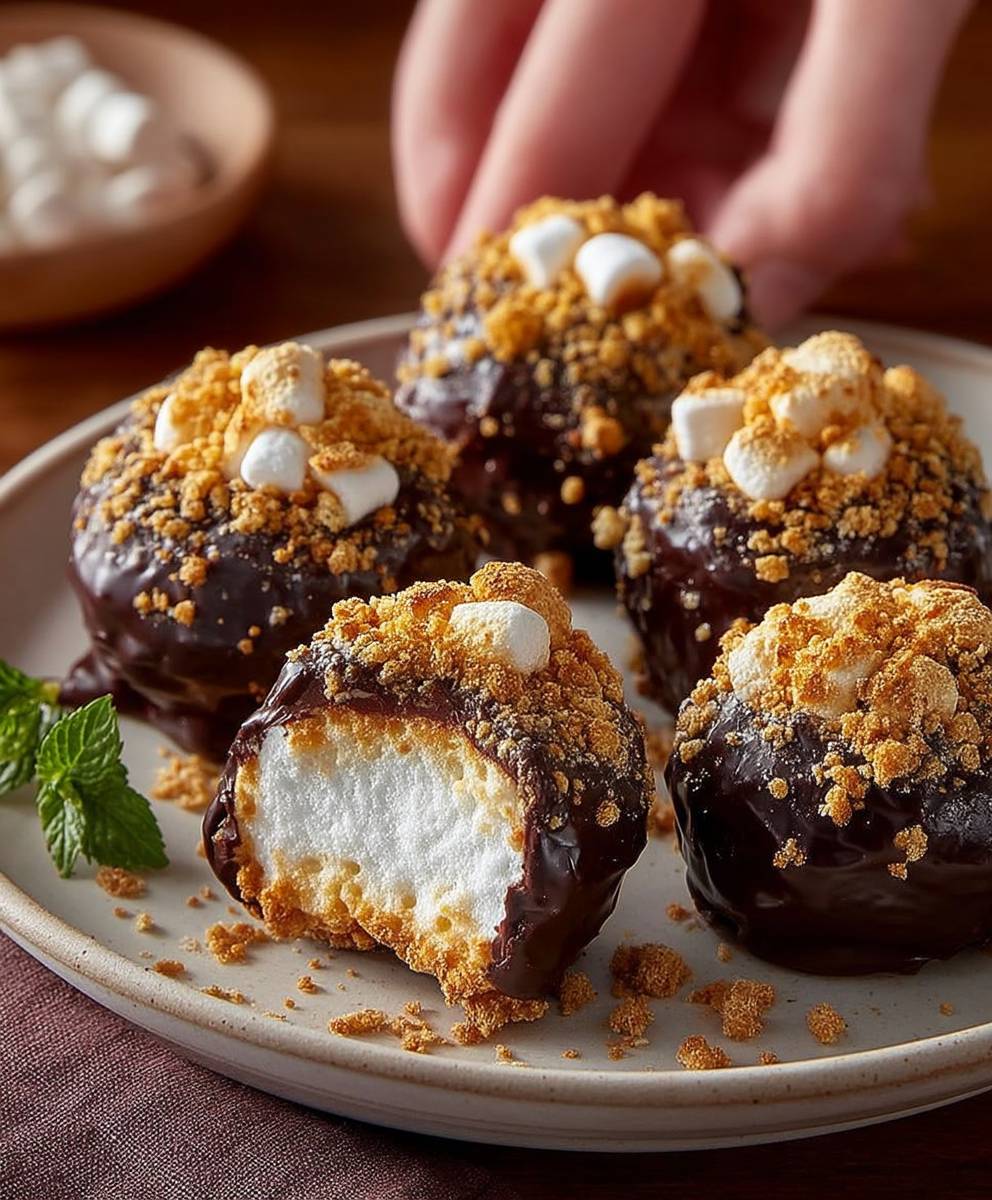
No-Bake S’mores Truffles are the perfect treat for anyone who loves the classic campfire dessert but wants to skip the hassle of roasting marshmallows. These delightful bites combine the rich flavors of chocolate, graham crackers, and gooey marshmallows, all without the need for an oven. Originating from the beloved American tradition of making s’mores, these truffles capture the essence of summer nights spent around the fire, making them a nostalgic favorite for many.
What makes No-Bake S’mores Truffles so irresistible is their creamy texture and the delightful crunch of graham cracker crumbs. They are not only easy to prepare but also incredibly satisfying to eat. Whether you’re hosting a gathering or simply indulging in a sweet treat at home, these truffles are sure to impress. With just a few simple ingredients, you can create a dessert that brings joy and comfort to any occasion. Join me as we dive into this delicious recipe that will have everyone asking for seconds!

Ingredients:
- 1 cup graham cracker crumbs
- 1/2 cup powdered sugar
- 1/2 cup unsweetened cocoa powder
- 1/2 cup mini marshmallows
- 1/2 cup creamy peanut butter
- 1/4 cup unsalted butter, softened
- 1 teaspoon vanilla extract
- 1 cup semi-sweet chocolate chips
- 1 tablespoon coconut oil (optional, for melting chocolate)
- Extra graham cracker crumbs for rolling
Preparing the Mixture
- In a large mixing bowl, combine the graham cracker crumbs, powdered sugar, and cocoa powder. Use a whisk to mix these dry ingredients thoroughly, ensuring there are no lumps.
- Add the mini marshmallows to the dry mixture. Gently fold them in, making sure they are evenly distributed throughout the mixture.
- In a separate bowl, mix together the creamy peanut butter, softened unsalted butter, and vanilla extract. Use a hand mixer or a spatula to blend these ingredients until smooth and creamy.
- Gradually add the peanut butter mixture to the dry ingredients. Stir with a spatula or your hands until everything is well combined. The mixture should be thick and slightly sticky.
- If the mixture feels too dry, you can add a little more peanut butter or a splash of milk to help it come together.
Forming the Truffles
- Once the mixture is well combined, take a small amount (about a tablespoon) and roll it into a ball between your palms. Aim for a size similar to a golf ball.
- Place the rolled truffles on a baking sheet lined with parchment paper. Make sure to leave some space between each truffle, as they may slightly expand.
- Continue rolling the rest of the mixture into balls until all of it is used. You should have around 20-25 truffles, depending on the size you make them.
- Once all the truffles are formed, place the baking sheet in the refrigerator for about 30 minutes. This will help them firm up and hold their shape better.
Melting the Chocolate
- While the truffles are chilling, prepare the chocolate coating. In a microwave-safe bowl, combine the semi-sweet chocolate chips and coconut oil (if using). The coconut oil will help the chocolate melt smoothly and give it a nice sheen.
- Microwave the chocolate in 30-second intervals, stirring in between, until it is completely melted and smooth. Be careful not to overheat the chocolate, as it can burn easily.
- Once melted, remove the bowl from the microwave and let it cool for a minute or two. This will prevent the chocolate from being too hot when you dip the truffles.
Dipping the Truffles
- Take the chilled truffles out of the refrigerator. Using a fork or a toothpick, dip each truffle into the melted chocolate, ensuring it is fully coated.
- Allow any excess chocolate to drip off before placing the coated truffle back onto the parchment-lined baking sheet.
- While the chocolate is still wet, sprinkle a little graham cracker crumb on top of each truffle for decoration and added texture.
- Repeat the dipping process for all the truffles until they are all coated in chocolate.
Chilling and Serving
- Once all the truffles are coated and decorated, place the baking sheet back in the refrigerator for about 30 minutes to allow the chocolate to set completely.
- After the chocolate has hardened, you can transfer the truffles to an airtight container for storage. They can be kept in the refrigerator for up to a week.
- When ready to serve, you can enjoy them straight from the fridge or let them sit at room temperature for a few minutes to soften slightly.
- These no-bake s’mores truffles are perfect for parties, gatherings, or just a sweet treat at home. Enjoy the delicious combination of chocolate, marshmallow, and graham cracker in every
Conclusion:
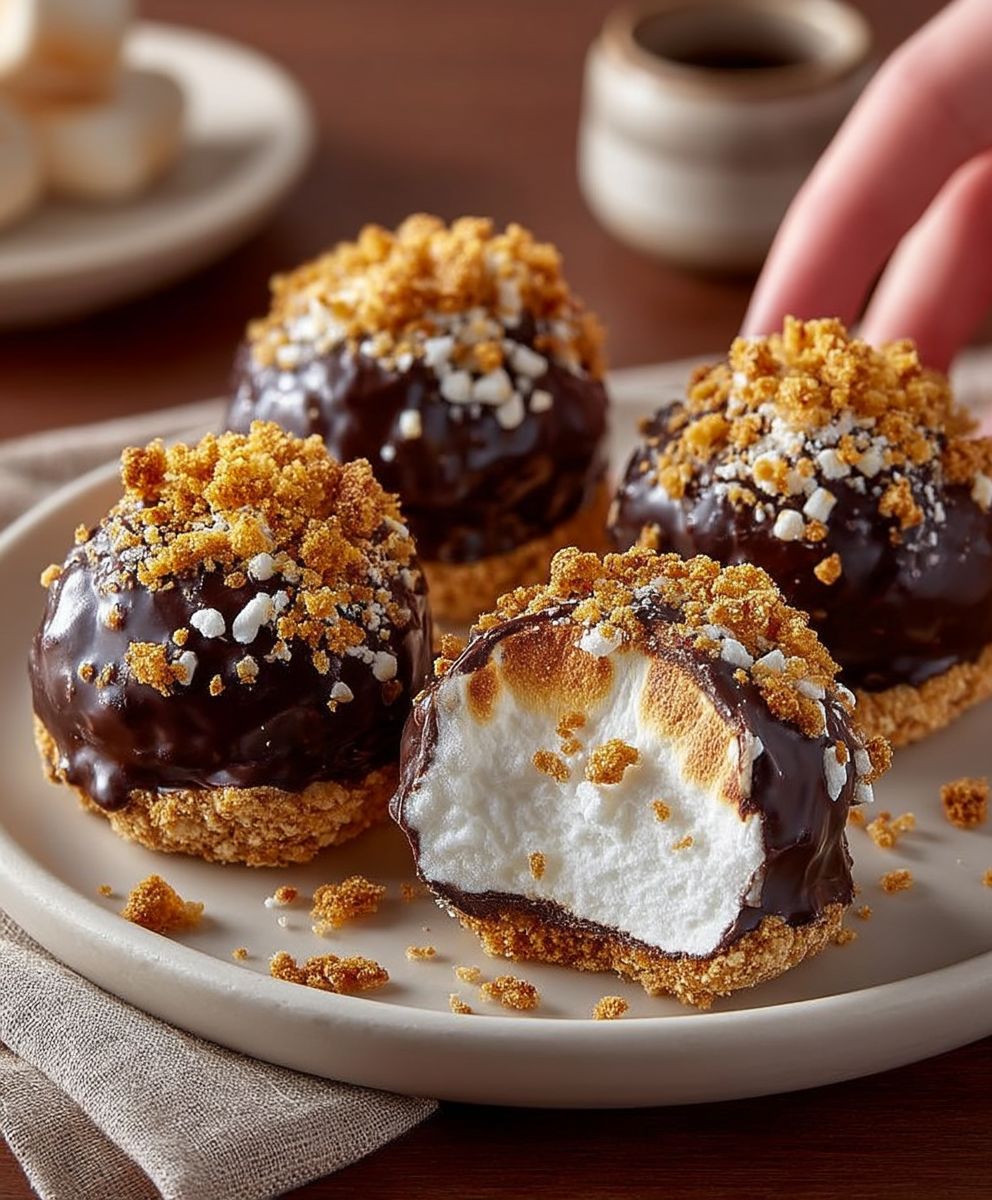
In conclusion, these No-Bake S’mores Truffles are an absolute must-try for anyone who loves the classic campfire treat but wants to enjoy it in a more convenient and indulgent form. The combination of creamy chocolate, crunchy graham crackers, and fluffy marshmallows creates a delightful explosion of flavors and textures that will leave your taste buds dancing with joy. Plus, the fact that they require no baking makes them an easy and quick dessert option for any occasion.
When it comes to serving suggestions, these truffles are incredibly versatile. You can present them on a beautiful platter for a party, or package them in cute little boxes as a thoughtful homemade gift. They also make for a fantastic addition to a dessert table at gatherings, where they can be the star of the show. If you want to elevate the experience even further, consider drizzling some melted chocolate or caramel over the top before serving, or rolling them in crushed nuts or coconut for an extra layer of flavor.
For those looking to mix things up, there are plenty of variations you can try with this recipe. You could swap out the chocolate for white chocolate for a different flavor profile, or even add a hint of peanut butter for a delicious twist. If you’re feeling adventurous, consider incorporating different flavored extracts, such as mint or almond, to give your truffles a unique spin. The possibilities are endless, and that’s what makes this recipe so exciting!
I wholeheartedly encourage you to give these No-Bake S’mores Truffles a try. They are not only simple to make but also incredibly satisfying to eat. Whether you’re making them for a special occasion or just to treat yourself, I promise you won’t be disappointed. Once you’ve made them, I would love to hear about your experience! Feel free to share your thoughts, any variations you tried, or even photos of your delicious creations. Your feedback is invaluable and can inspire others to dive into this delightful recipe as well.
So gather your ingredients, roll up your sleeves, and get ready to indulge in these scrumptious No-Bake S’mores Truffles. I can’t wait for you to experience the joy they bring!
No-Bake S'mores Truffles: Easy Recipe for a Delicious Treat
Indulge in these No-Bake S'mores Truffles, featuring a delightful mix of chocolate, marshmallow, and graham cracker flavors. Easy to prepare, these treats are perfect for parties or a sweet snack at home!
Ingredients
- 1 cup graham cracker crumbs
- 1/2 cup powdered sugar
- 1/2 cup unsweetened cocoa powder
- 1/2 cup mini marshmallows
- 1/2 cup creamy peanut butter
- 1/4 cup unsalted butter, softened
- 1 teaspoon vanilla extract
- 1 cup semi-sweet chocolate chips
- 1 tablespoon coconut oil (optional, for melting chocolate)
- Extra graham cracker crumbs for rolling
Instructions
- In a large mixing bowl, combine the graham cracker crumbs, powdered sugar, and cocoa powder. Use a whisk to mix these dry ingredients thoroughly, ensuring there are no lumps.
- Add the mini marshmallows to the dry mixture. Gently fold them in, making sure they are evenly distributed throughout the mixture.
- In a separate bowl, mix together the creamy peanut butter, softened unsalted butter, and vanilla extract. Use a hand mixer or a spatula to blend these ingredients until smooth and creamy.
- Gradually add the peanut butter mixture to the dry ingredients. Stir with a spatula or your hands until everything is well combined. The mixture should be thick and slightly sticky.
- If the mixture feels too dry, you can add a little more peanut butter or a splash of milk to help it come together.
- Once the mixture is well combined, take a small amount (about a tablespoon) and roll it into a ball between your palms. Aim for a size similar to a golf ball.
- Place the rolled truffles on a baking sheet lined with parchment paper. Make sure to leave some space between each truffle, as they may slightly expand.
- Continue rolling the rest of the mixture into balls until all of it is used. You should have around 20-25 truffles, depending on the size you make them.
- Once all the truffles are formed, place the baking sheet in the refrigerator for about 30 minutes. This will help them firm up and hold their shape better.
- While the truffles are chilling, prepare the chocolate coating. In a microwave-safe bowl, combine the semi-sweet chocolate chips and coconut oil (if using). The coconut oil will help the chocolate melt smoothly and give it a nice sheen.
- Microwave the chocolate in 30-second intervals, stirring in between, until it is completely melted and smooth. Be careful not to overheat the chocolate, as it can burn easily.
- Once melted, remove the bowl from the microwave and let it cool for a minute or two. This will prevent the chocolate from being too hot when you dip the truffles.
- Take the chilled truffles out of the refrigerator. Using a fork or a toothpick, dip each truffle into the melted chocolate, ensuring it is fully coated.
- Allow any excess chocolate to drip off before placing the coated truffle back onto the parchment-lined baking sheet.
- While the chocolate is still wet, sprinkle a little graham cracker crumb on top of each truffle for decoration and added texture.
- Repeat the dipping process for all the truffles until they are all coated in chocolate.
- Once all the truffles are coated and decorated, place the baking sheet back in the refrigerator for about 30 minutes to allow the chocolate to set completely.
- After the chocolate has hardened, you can transfer the truffles to an airtight container for storage. They can be kept in the refrigerator for up to a week.
- When ready to serve, you can enjoy them straight from the fridge or let them sit at room temperature for a few minutes to soften slightly.
- These no-bake s’mores truffles are perfect for parties, gatherings, or just a sweet treat at home. Enjoy the delicious combination of chocolate, marshmallow, and graham cracker in every bite!
Notes
- For a richer chocolate flavor, consider using dark chocolate chips instead of semi-sweet.
- You can customize the truffles by adding nuts or other mix-ins to the mixture.


Leave a Comment