
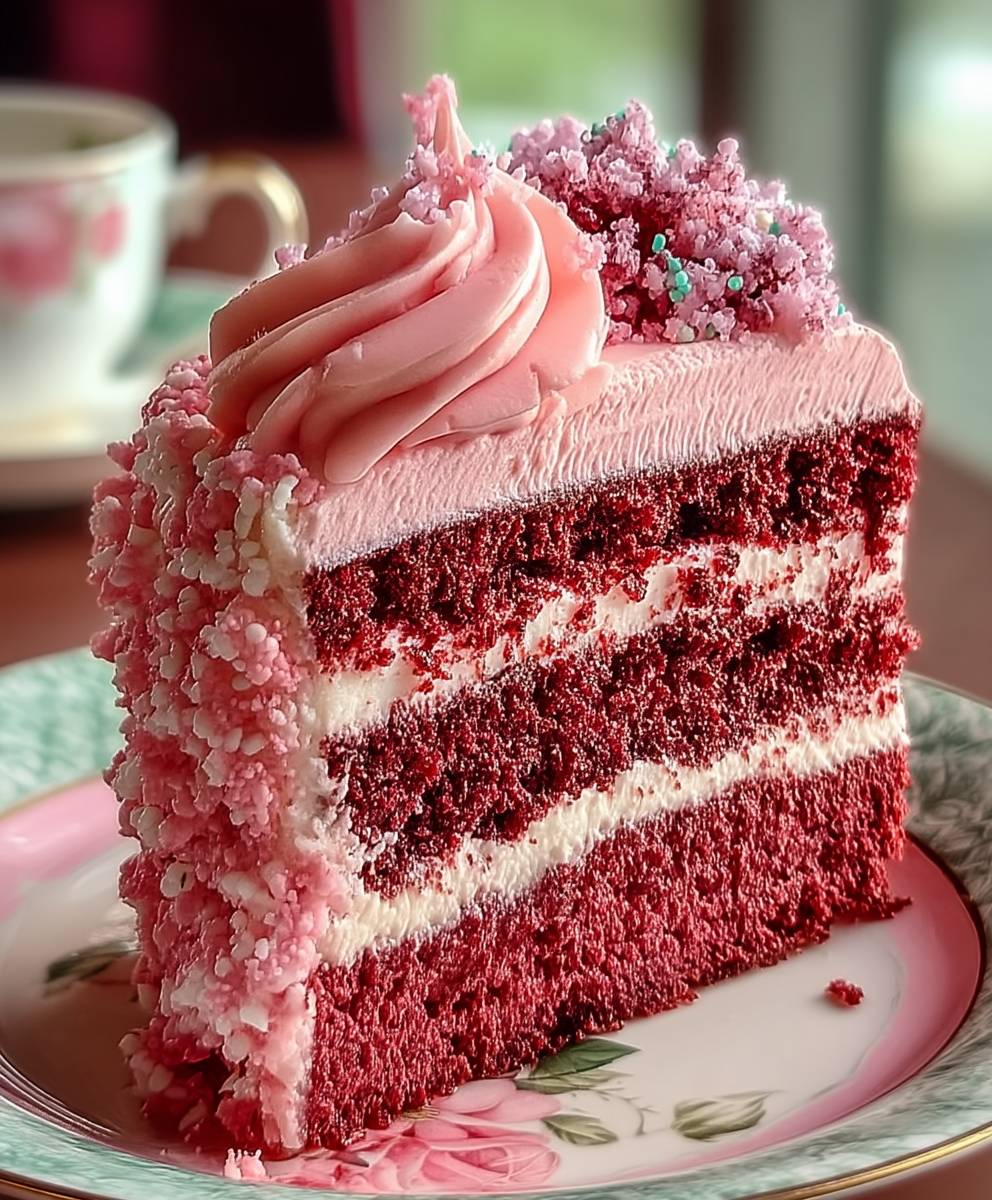
Pink Velvet Cake: A Sweet Delight for Every Occasion
Pink Velvet Cake is not just a dessert; it’s a celebration on a plate! This delightful treat combines the rich, velvety texture of traditional red velvet cake with a charming pink hue that instantly brightens any gathering. Originating from the classic Southern dessert scene, the pink version has gained popularity for its whimsical appearance and delicious flavor, making it a favorite for birthdays, weddings, and baby showers.
People adore Pink Velvet Cake for its unique taste, which balances the subtle cocoa flavor with a hint of vanilla, creating a moist and tender crumb that melts in your mouth. The creamy frosting, often made with cream cheese or buttercream, adds a luscious finish that perfectly complements the cake’s sweetness. Not only is it a feast for the taste buds, but its stunning color also makes it a showstopper on any dessert table. Whether you’re an experienced baker or a novice in the kitchen, this recipe for Pink Velvet Cake is sure to impress your family and friends!

Ingredients:
- 2 ½ cups all-purpose flour
- 1 ½ cups granulated sugar
- 1 cup unsalted butter, softened
- 1 cup buttermilk, at room temperature
- 4 large eggs, at room temperature
- 1 tablespoon vanilla extract
- 1 tablespoon cocoa powder
- 1 teaspoon baking powder
- 1 teaspoon baking soda
- ½ teaspoon salt
- 1 tablespoon red food coloring
Preparing the Batter
- Preheat the oven: Start by preheating your oven to 350°F (175°C). This ensures that your cake bakes evenly.
- Prepare the cake pans: Grease and flour two 9-inch round cake pans. You can also line the bottoms with parchment paper for easier removal later.
- Mix dry ingredients: In a medium bowl, whisk together the flour, cocoa powder, baking powder, baking soda, and salt. Set this mixture aside as we will incorporate it later.
- Cream the butter and sugar: In a large mixing bowl, use an electric mixer to cream the softened butter and granulated sugar together on medium speed until the mixture is light and fluffy, about 3-5 minutes.
- Add eggs and vanilla: Add the eggs one at a time, mixing well after each addition. Then, add the vanilla extract and mix until combined.
- Incorporate the food coloring: Add the red food coloring to the butter mixture and mix until the color is evenly distributed. You can adjust the amount of food coloring to achieve your desired shade of pink.
- Combine wet and dry ingredients: Gradually add the dry ingredient mixture to the wet ingredients, alternating with the buttermilk. Start and end with the dry ingredients. Mix until just combined; be careful not to overmix.
Cooking Process
- Pour the batter: Divide the batter evenly between the prepared cake pans. Use a spatula to smooth the tops if necessary.
- Bake the cakes: Place the pans in the preheated oven and bake for 25-30 minutes, or until a toothpick inserted into the center comes out clean. Keep an eye on them to avoid overbaking.
- Cool the cakes: Once baked, remove the cakes from the oven and let them cool in the pans for about 10 minutes. Then, carefully turn them out onto a wire rack to cool completely.
Preparing the Frosting
- 1 cup unsalted butter, softened
- 4 cups powdered sugar
- 1/4 cup heavy cream
- 1 tablespoon vanilla extract
- 1-2 tablespoons red food coloring (optional, for color)
- Make the frosting: In a large mixing bowl, beat the softened butter with an electric mixer on medium speed until creamy, about 2 minutes.
- Add powdered sugar: Gradually add the powdered sugar, mixing on low speed until combined. This helps to avoid a sugar cloud in your kitchen!
- Incorporate cream and vanilla: Add the heavy cream and vanilla extract, then beat on medium speed for another 2-3 minutes until the frosting is light and fluffy. If you want a deeper pink color, add the red food coloring and mix until you achieve your desired shade.
Assembling the Cake
- Level the cakes: If your cakes have domed tops, use a serrated knife to level them so they stack evenly.
- Place the first layer: Place one layer of the pink velvet cake on a serving plate or cake stand. This will be the base layer.
- Add frosting: Spread a generous amount of frosting on top of
Conclusion:
If you’re looking for a show-stopping dessert that’s as delightful to eat as it is to look at, then this Pink Velvet Cake is an absolute must-try! With its soft, velvety texture and a beautiful blush hue, this cake is perfect for any occasion, whether it’s a birthday celebration, a bridal shower, or just a sweet treat to brighten your day. The combination of rich flavors and the stunning visual appeal makes it a standout dessert that will impress your family and friends.
One of the best things about this Pink Velvet Cake is its versatility. You can serve it as a classic layer cake, adorned with a luscious cream cheese frosting that complements the cake’s sweetness perfectly. For a fun twist, consider adding a sprinkle of edible glitter or fresh berries on top for an extra pop of color and flavor. If you’re feeling adventurous, you can even experiment with different fillings, such as raspberry jam or lemon curd, to add a unique touch to each slice.
For those who prefer a more casual presentation, you can transform this cake into cupcakes! Just adjust the baking time accordingly, and you’ll have a batch of delightful Pink Velvet Cupcakes that are perfect for sharing. You can also try making a mini version of the cake in a jar for a fun and portable dessert option. The possibilities are endless, and I encourage you to get creative with your own variations!
I truly believe that baking is not just about following a recipe; it’s about creating memories and sharing joy with others. So, I invite you to try this Pink Velvet Cake recipe and experience the happiness it brings. Whether you’re baking it for a special occasion or just to treat yourself, I promise you won’t be disappointed.
Once you’ve made this cake, I would love to hear about your experience! Did you stick to the classic recipe, or did you add your own twist? Share your thoughts and any variations you tried in the comments below. Your feedback not only helps me improve but also inspires others in our baking community. So, roll up your sleeves, gather your ingredients, and let’s make some delicious memories with this Pink Velvet Cake! Happy baking!
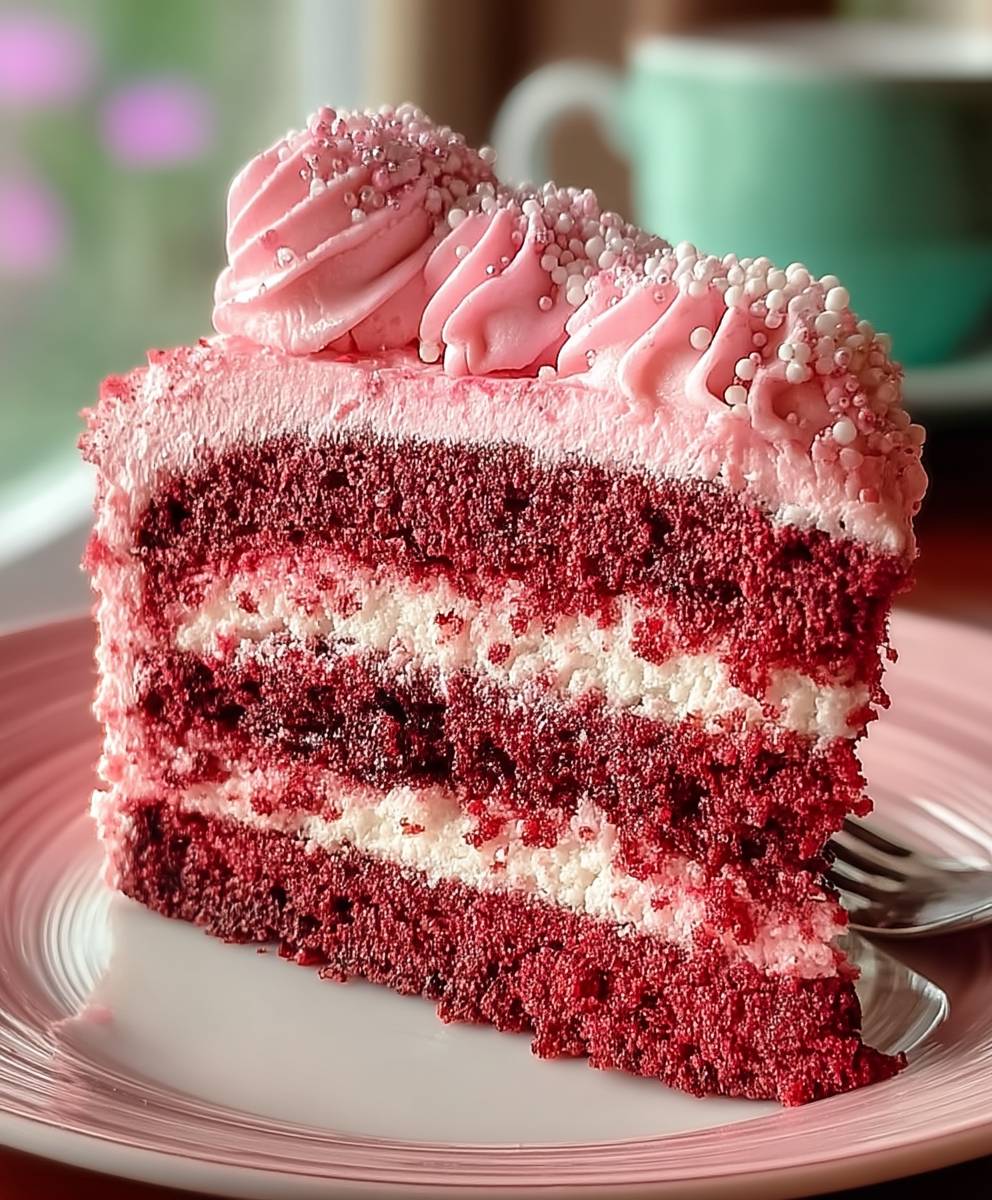
Pink Velvet Cake: A Deliciously Unique Twist on Classic Desserts
This delightful Pink Velvet Cake is a moist and fluffy treat, perfect for any celebration. With its vibrant color and rich flavor, it's sure to impress your guests!
Ingredients
- Ingredients for Pink Velvet Cake
- 2 ½ cups all-purpose flour
- 1 ½ cups granulated sugar
- 1 cup vegetable oil
- 1 cup buttermilk
- 3 large eggs
- 2 tablespoons red food coloring
- 1 teaspoon vanilla extract
- 1 teaspoon baking soda
- 1 teaspoon salt
- 1 teaspoon white vinegar
Instructions
- Smoothing it out evenly with a spatula.
- Carefully place the second layer of cake on top of the frosted first layer.
- Use the remaining frosting to cover the top and sides of the cake, smoothing it out as desired.
- Optionally, you can decorate the cake with sprinkles, fresh fruit, or any other toppings of your choice.
- Slice the cake and serve it to your guests. Enjoy your delicious pink velvet cake!
Notes
- Make sure all your ingredients are at room temperature for the best results.
- You can adjust the amount of red food coloring based on how vibrant you want the cake to be.
- This cake pairs wonderfully with cream cheese frosting for a tangy twist.

Leave a Comment